X88 expeditions - Documenting and sharing overland travels, adventures, and expeditions

August 30, 2008

Penn’s View

The trail continues until it joins back up with the maintained Poe Paddy Dr which takes visitors up to Penn's View, the nicest overlook in the area.

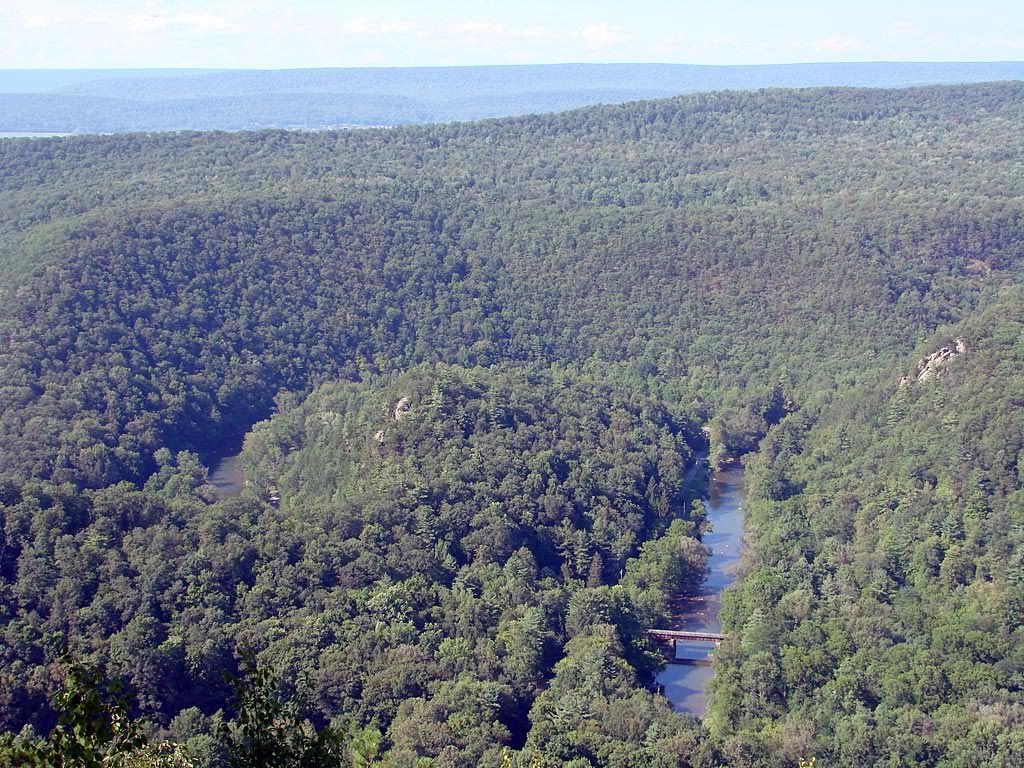
I stopped at Penn's View for a nice lunch. No one else was around and the site was very relaxing. Its very quiet up there so I was surprised to hear some distant voices. I thought maybe that some hikers were coming up the trail but nobody showed up. I kept hearing those voices in the distance and started to think that maybe there was some old Native legend for the area (did anyone see Last of the Mohicans?)

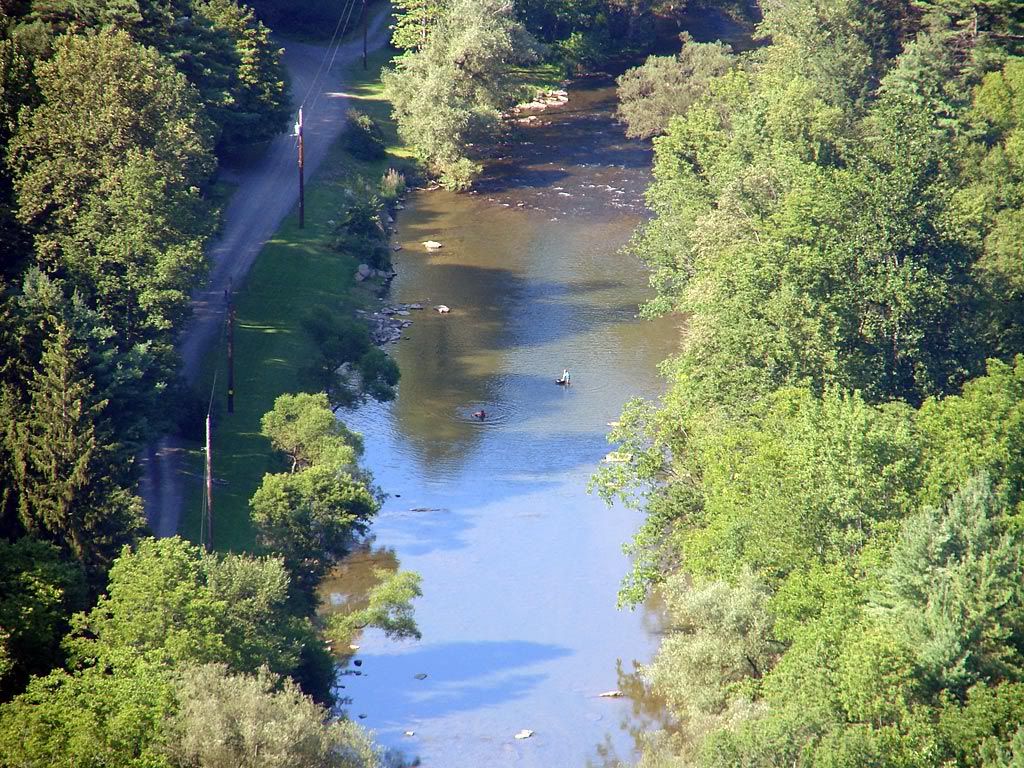
As I took my camera out and started to take some pictures I realized what I was hearing, it was a couple of swimmers in Penn's Creek over 1000 feet down and across!

The maintained gravel road turns back into pavement at around the Greenbriar Gap. I headed north back to Penn's Valley Road and then back onto my route for home.

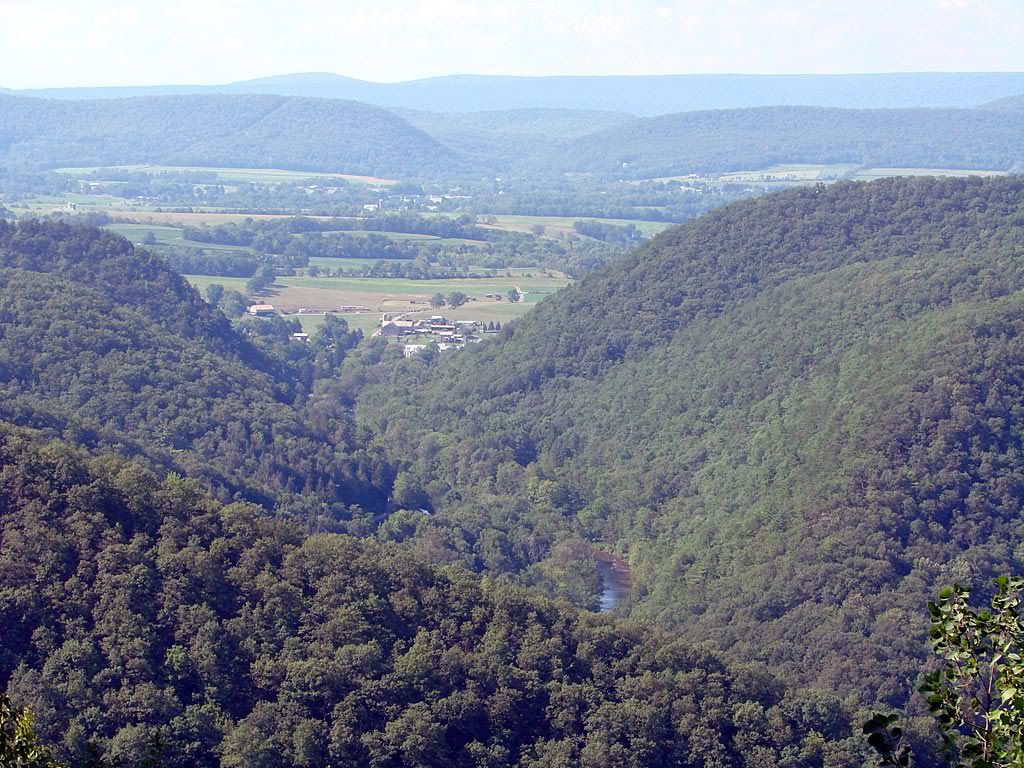
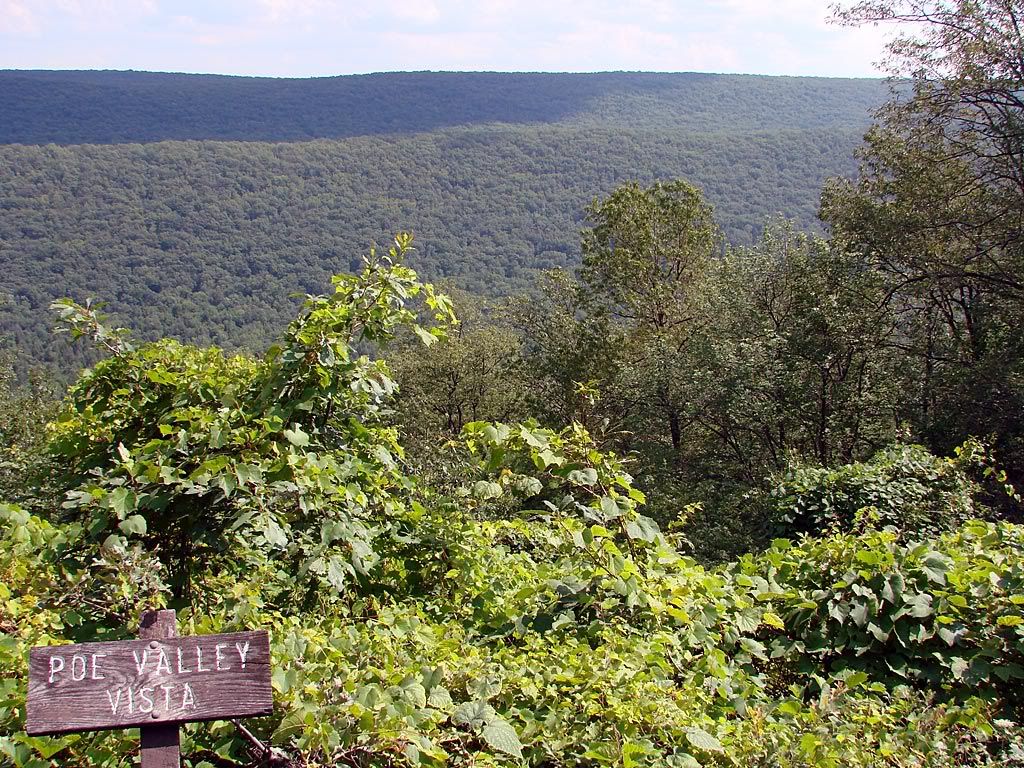
Overall a very nice diversion in the PA mountains with more available to explore.

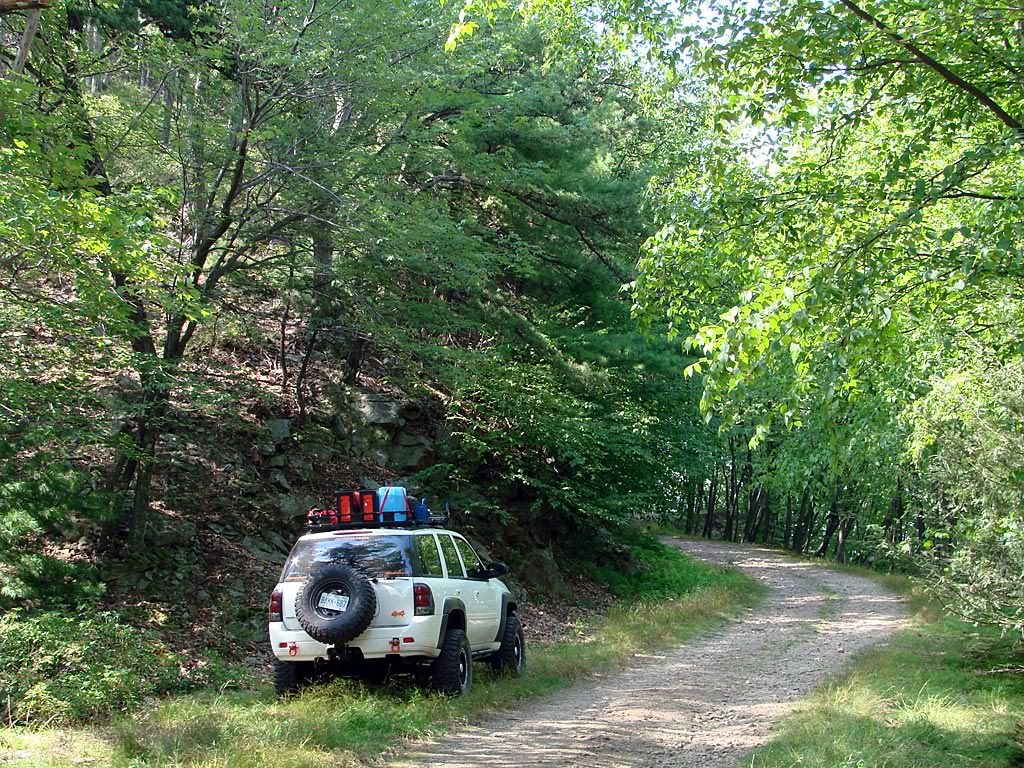
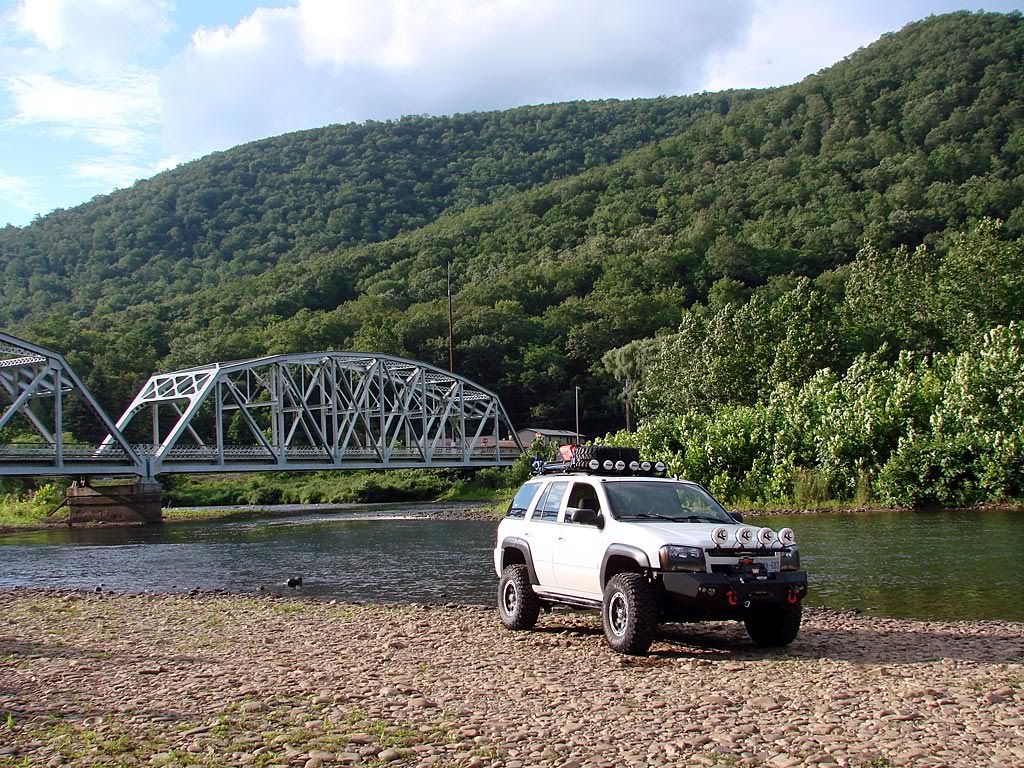
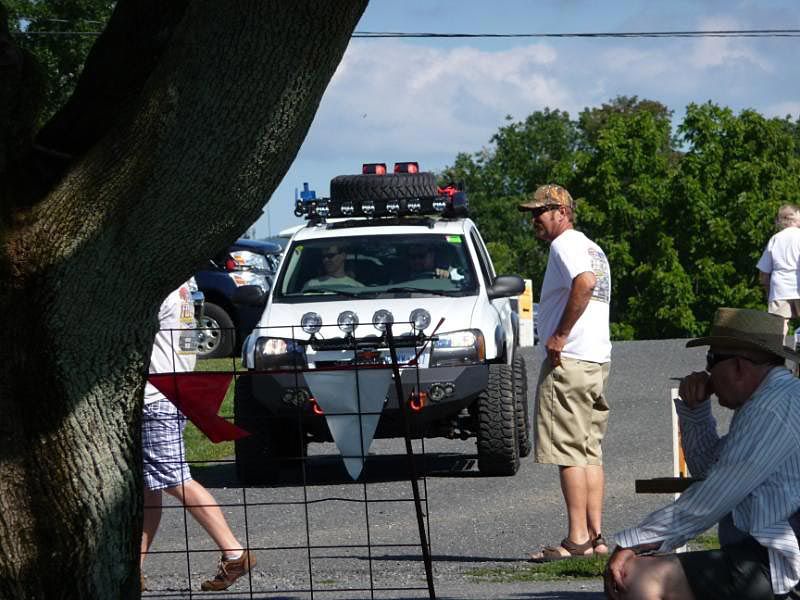
Here are some pictures from the original Hummer article. I recognise the 1st two as Penn's View, but I didn't even come close to any water crossings. I wonder where they took that one?

Poe Valley

After a great couple of days in Carlisle, I planned my trip back home that would take me to the Penn's Valley route. I sourced this particular route from a now-defunct web site that was the online version of HMR Magazine (a Hummer publicaition).

Its a circular route that traverses the Poe and Penn valleys, you can see the Google map below.

I started in Spring Mills and followed the route to the Vonada Gap. Shortly after the road turns into graded gravel as it heads up to Big Poe Mountain at 2000 feet. These two pictures are after you crest the ridge and head down the other side.

Once down in Poe Valley you hit pavement again as it goes past Poe Valley State Park. The park however was closed and the small lake drained, I guess they were doing some maintenance. The road continues to Poe Paddy State Park where there was some camping going on. I drove through slowly looking for the trail turn off heading back up the ridge towards Ravens Knob. There is signage but you have to pay attention.

The trail up is basically a fairly wide shelf road that is not maintained so it is a but bumpy and rocky, but nothing serious for a modified vehicle. I did pass a mini-van s l o w l y driving down the other way which was prudent because some of the rocks could easily damage street tires. You can see steep drop-offs through the trees from the shelf road but it definitely is not the same as driving above the tree line in Colorado.

Once on the ridge, there are various spots with great overlooks, nice back-country camp sites, and a couple of side trails designated as forest roads. I think this area is part of a state forest so I believe camping is allowed. I wish I had more time to explore those trails though.

Some of this area falls within the Bald Eagle State Forest. There is a detailed map here.
View map in larger window.

Map References - Poe and Penn Valleys

All Truck Nationals

The All Truck Nationals is a huge show and exhibition that takes place every year in Carlisle, PA. Visitors and participants come from all over North America to show and see a wide variety of trucks and truck-related products.

I participated for the first time this year and was part of the TrailVoy club area which is spearheaded by Fishhunter911 (Joe). Here are some pictures taken by various club members.

Its really fun to get to see the people who participate and offer a LOT of help and advice online.

On My Way to Carlisle - Penn’s Valley

My original plan was to take an off-road detour on my way down to the All Truck Nationals in Carlisle, PA.

A slight change in plans however delayed the detour for the trip back as I had to head straight down with as few stops as possible. I did make one quick stop though. As I was crossing the bridge below, I noticed a vehicle by the side of the river, so I quickly looked for and found an access trail. I didn't have time to explore further, only take a couple of shots.

And then a little while later just before dusk, a nice early-evening sky showed up.

August 29, 2008

Going For The 4•5•6 - Electronics

Here is a picture of the switch installed. This seemed to be the only place to put it that didn't require removing the whole dash cover. And even here, because the metal knee plate underneath extends all the way to the right, there needed to be some cutting done of that plate.
The power lead was taken out to the engine bay where we used an "add a circuit" fuse tap like this one:
I tapped into a 10 amp position called "Ignition E". This way the locker can only draw power when the ignition is in the "on" position.

Useful Gauges - Technical

Here are some pictures in the daytime and some close ups.
I looked up the wiring I used in my Helms manuals. I don't have the actual diagrams handy to post, but here are specs from the actual books:

Power lead for gauges
I used switched power under the steering column so that the lights only come on when all the other lights do.

Helms Volume 3 (2006)
Page 8-1228
C201 Steering column harness to I/P harness
Pin B6 - Brown - Circuit# 4 - Accessory voltage

Dimming for gauges
I used a lead at the headlight switch

Helms Volume 3 (2006)
Page 8-574
Headlamp switch C1
Pin B - Brown/White - Circuit# 230 - Instrument panel lamps dimming control

For ground I tested a few bolts that were easily reached through the side dash panel (the one that is accessible when you open the door). I ended up using one that bolts the entire dash assembly to the body.

August 28, 2008

Useful Gauges - Gauge Mounting

For the gauges, I decided to not adapt any kind of A-pillar mount and use the Autometer black mounting cups.
It was a bit of a challenge to get everything line up properly and facing the best way, but in the end, I think it turned out great. The gauges readings are very visible while driving either during the day or at night. The only thing at night is that the gauge lights are quite a bit brighter than the dash lights.

Useful Gauges - Sender Mounting

Since I had already installed a B&M deep transmission oil pan, I had a place to mount the temperature sender as it has an extra port for that use.

The only problem was that its position would interfere with the shift linkage and rubber boot. So an L fitting had to be used along with a couple of other brass fittings to mount the sensor:

For the water temp sensor, there was no available port to use so I decided to use the Autometer hose adapter:
The coolant hose is cut and this fitting inserted. It then allows the sensor to be used. One item of note, if using electronic gauges the fitting itself has to be grounded.

I decided to use the part of the coolant hose that is just above the driver side frame rail. Its a nice straight section and not too difficult to access.

August 27, 2008

Useful Gauges - Background

I never fully trust my instrument cluster because I don't know which gauges are real, and which ones are disguised as gauges but really only indicate some sort of on/off value.

As you can see I am in the lifted/offroad category, so the 2 sets of temperatures that seem to be the most important are coolant (water) and transmission oil. When out on the trail you want to make sure neither of these gets too high, if they do, its time to stop and let everything cool off. Particularly if wheeling in hot climates.

I haven't installed gauges for a while (since my 1997 Grand Prix GTP) so I was pleased to see that Autometer has expanded their selection of gauges. And I was really pleased to see that they have continued to release full sweep electronic gauges.

Why "full sweep"? Well, they indicate a temperature range over 270 degrees (angle not temp) vs. only 90 degrees in the old style electronic gauges. With this you get much more precise readings.

Several years back, to achieve this, the gauges came with pretty big external electronic boxes that interpreted the temperature sender's signals and allowed an accurate number to be displayed. They were a pain to install because there were several wires and you had to find a place to hide those boxes.

The new generation of gauges have all the electronics built right into the gauge. And for wiring there are only 5 leads - 2 to the sender, and 3 for the gauge itself - power, ground, dimmer power.

Going For The 4•5•6 - Driving Impressions

So was all this worth it?

I would have to say a definite YES!

The power is definitely back and obviously head and shoulders above what 3.42 gives you with 33" tires.

The Auburn locker is excellent as well. When not locked via the switch, it works like a limited slip and engages the other axle under the right conditions. Here's a diagram and write up:

With the gears, locker, and low range transfer case working in conjunction, I had absolutely no problem at the offroad weekend I participated in. There was no obstacle I could not power over including steep rock climbs, deep water, mud, descents, etc. etc. The only thing that takes getting used it is the fairly strong and loud "smacking" (for lack of a better word) when the locker temporarily unlocks the axles when turning.

As for road impressions. I do think I will be using more gas but I don't have actual numbers yet. I did test out what the RPMs are though:

  • 60 km/hr just under 2000 rpm
  • 100 km/hr just over 2000 rpm

Also don't forget that the PCM has to be reprogrammed just like when the tire size is significantly changed.

Going For The 4•5•6 - Wrong Rear Axle

OK, so what's the story with the rear housing. Again, first some pictures. Here it is installed, with the Purple Cranium diff guard and the SuicideDoors adjustable panhard bar. Ryan says he got the axle aligned to within 1/8th of an inch.
One thing you may notice is that the anti-sway bar is missing! Well, its not entirely missing, you can see where we had to cut it. This was the result of some recent trail damage and trail repairs. More on that when I get some pictures together from the weekend event I attended.

You will notice where the control lead for the Auburn Ected locker exits the diff cover. These wires extend all the way up to the engine bay and into the driver's side where the switch is. I will have pictures of the switch and where the power is tapped shortly.

So, what about that 2005 rear axle housing I bought for so cheap? Well the problem that I missed is that in 2006, GM upgraded the ABS system to a 4 channel system. So 2006+ housings have ABS sensors right in the housing, close to the ends but before the brake shield. Other than that, they are identical (except for the pumpkin size).

2005 and prior, the sensor must have been somewhere before the rear housing because it does not have a sensor anywhere. In fact, now that I think about it, the actual axles may also be different between the years since the 2006+ sensors work with the speed of the axles.

So how does that leave me? Its on and workable ... for now. I have to live with:

  • My ABS light being on all the time (the rear ABS leads are disconnected)
  • Stabillitrack being off all the time (I pulled the fuse because it would keep indicating that it was active)

So for the record, an 8.6 EXT or V8 rear axle housing will bolt on no problem to a SWB Trailblazer, and the gearing parts for 8.5/8.6 diffs work perfectly. The only item of concern is to make sure you stick with the 2006 changeover year - 2002 to 2005 only - 2006+ only.

I am thinking of upgrading to a 2006 housing before winter comes around. They are now much more easily found at auto yards for under $500. It would mean another gear swap but I am thinking it may be worth it to have 4 wheel ABS and traction control for the winter conditions up here.

Going For The 4•5•6 - Gears In

So lets take a look at some pictures first. Here is the rear axle with the cover off and the gears+locker in. You can see the Auburn Ected electronic locker installed with its wiring leads.
Ryan and his team, the great mechanics and fabricators over at National 4WD, said that the parts went into the housing with no significant problems or modifications. This goes for the front housing as well (see earlier post pictures of the tiny housing). The only thing he had to do was to hammer the axles in a bit more than usual so that they would reach the locker's splines.

Unfortunately I don't have any pictures of open front housing. And even though the 7.2 parts went in relatively without a hitch, I have to warn any potential gear swappers, that changing gears in the front housing is a very complicated, time consuming, and potentially expensive endeavour!

Here's a direct quote from Ryan:
What a job to get the front diff out I don't want to have to do it any time soon again!!!!!

The situation is that to swap the gears, you have to remove the housing. To remove the housing you have to drop the oil pan. To drop the oil pan, you have to remove the steering rack, the anti-sway bar, etc.

Just so everybody knows, the GM labor guide to drop and re-install the oil pan is listed at 10 hours!

Again, the good part is that the Yukon Gear parts and install kit all fit nicely into the housing. One exception is the side seals that come with the kit, they don't work with our unit so you have to get the GM seals instead.

But at the end of the day, all the 4.56 parts were correct and fit into the housings properly.

So for the record, a 2003 front housing (which I got from the auto yard) successfully bolted up to my 2006 Trailblazer. The rear housing has a little story to it.

August 24, 2008

Lighting - All Lamps Mounted!

Well after a very busy month I am back at posting news and builds. During this time I attended the All Truck Nationals at Carlisle, PA and had a great time, had the Trailblazer in for the BIG mod for this year, and attended the annual CampNL off-road weekend in Ontario.

The lights were mounted before all this activity but I did not get a chance to wire them up. In fact, I still don't have them wired up so I will be working on this over the next few weeks.

So for now, here are some pictures from both of the events mentioned above with the light covers off and on.

Carlisle pics thanks to Fishhunter911, Annydude41, and ssmedt. CampNL pics thanks to Mike Lascut - mikephoto.com

Mounting the 4-light bar in front of the grille ended up OK but not perfect. I used aluminum square tubes, L bars, and flat bars in combination to achieve a surface just in front of the grille to mount the bar to. Behind the grille its mounted to the large plastic piece that extends all the way across the front of the vehicle. This is the piece that the headlights attach to using the "slide" mounts. Even though I reinforced it as much as I could, the weight of the bar plus lights does cause it to "bounce" on rough surfaces and with heavy wind or highway driving. I am working on a fix to that. When all done I will get some more detailed pictures as well as a wiring write up.