X88 expeditions - Documenting and sharing overland travels, adventures, and expeditions

October 30, 2009

Surco Safari Roof Rack - Revisited

All right, big time update to the Safari Rack info. I did several changes and enhancements this year and have basically had it on the vehicle starting from my TECORE/MORA trip up until writing this. It will soon need to come off though in preparation for winter.
I purchased the great Camping Lap 70" awning last winter. With their price and free shipping, you can't go wrong. It is very sturdy and stood up to fairly high winds on the beach at the Outer Banks.

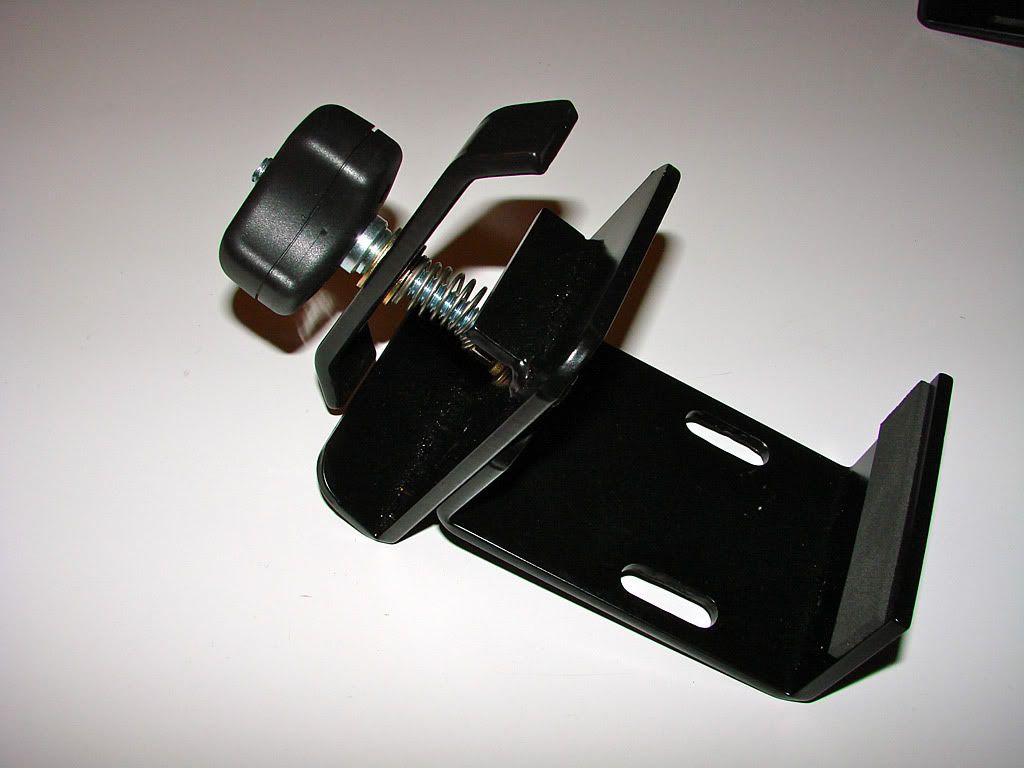
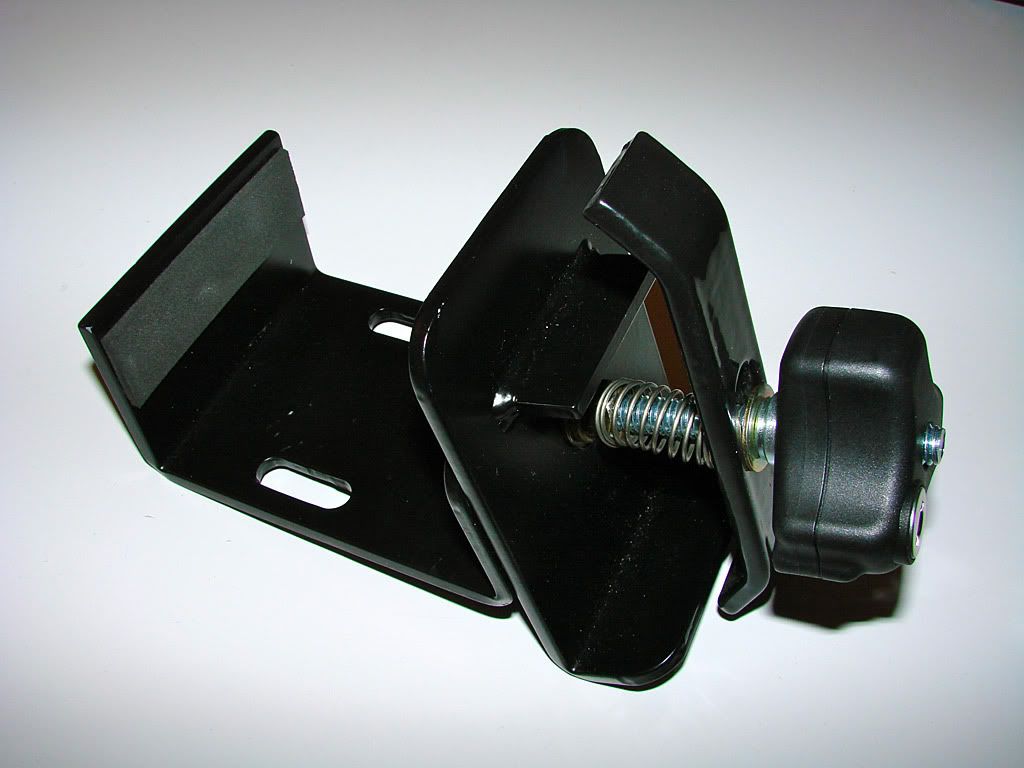
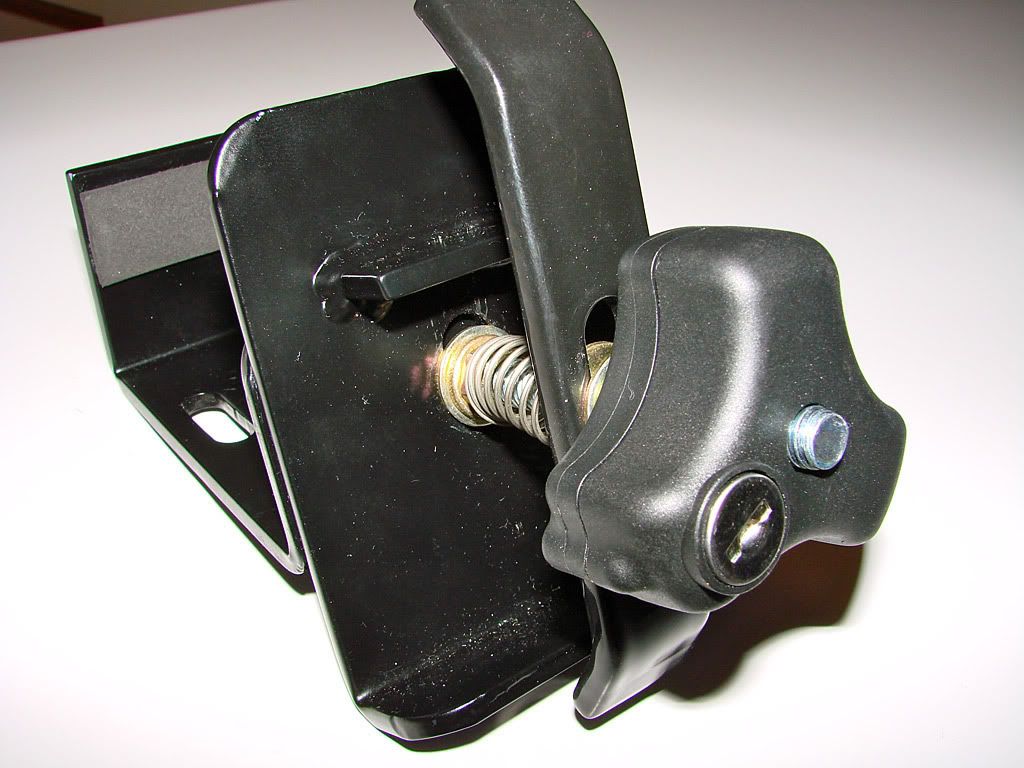
It has a very simple mounting system. You get 2 large L-brackets made from stainless steel with several holes in them. How these bolt up to any given roof rack is up to the user. I ended up buying an extra light mount kit from Surco and used the mounting brackets from the kit.

The other end is drilled to match the channels in the extruded aluminum frame of the awning. You slide the provided bolts into the channels (which stops them from spinning) and bolt the frame to the brackets.

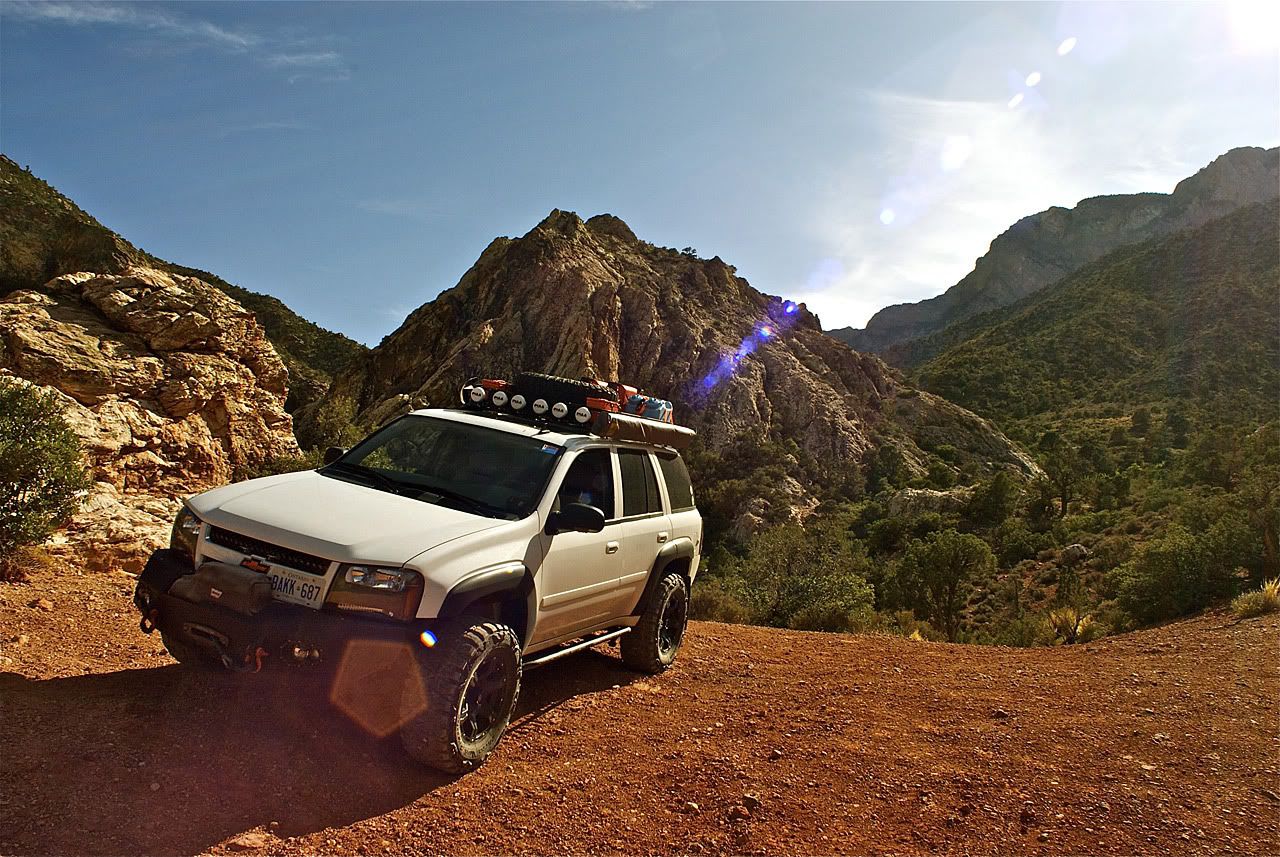
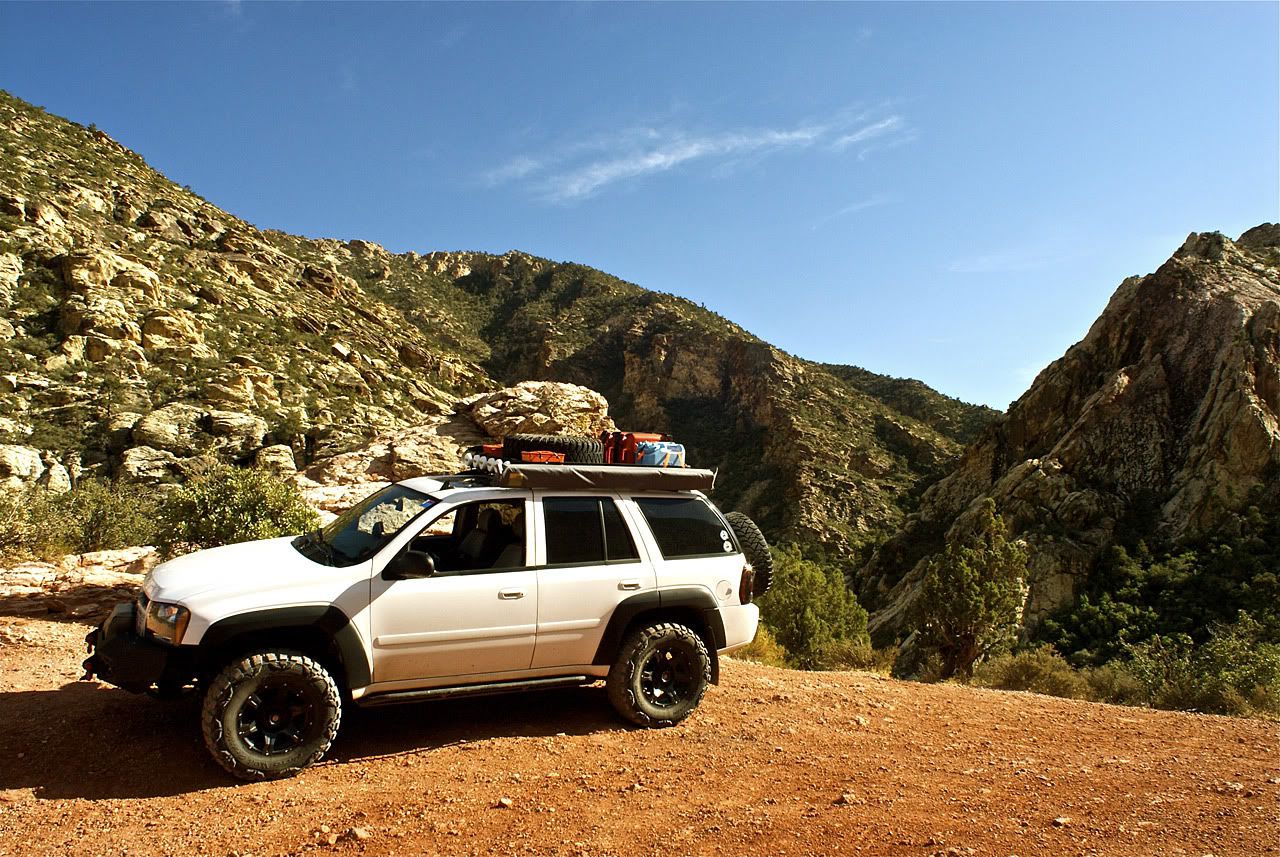
Hi-Lift Removed & Awning Added

I was on the lookout for a better way to mount the axe and shovel for quite a while. The Surco mounts are OK, but their real problem is that you needed a socket wrench to remove the axe or shovel. Unfortunately most mounting systems work this way, until I found this really great solution.
It is from GOBI Racks and designed for an H2. The locking mechanism is great and removing the items is now much faster and easier. Here are some close-ups of the mounting brackets.
Here are a couple of shots with the mounts in use.

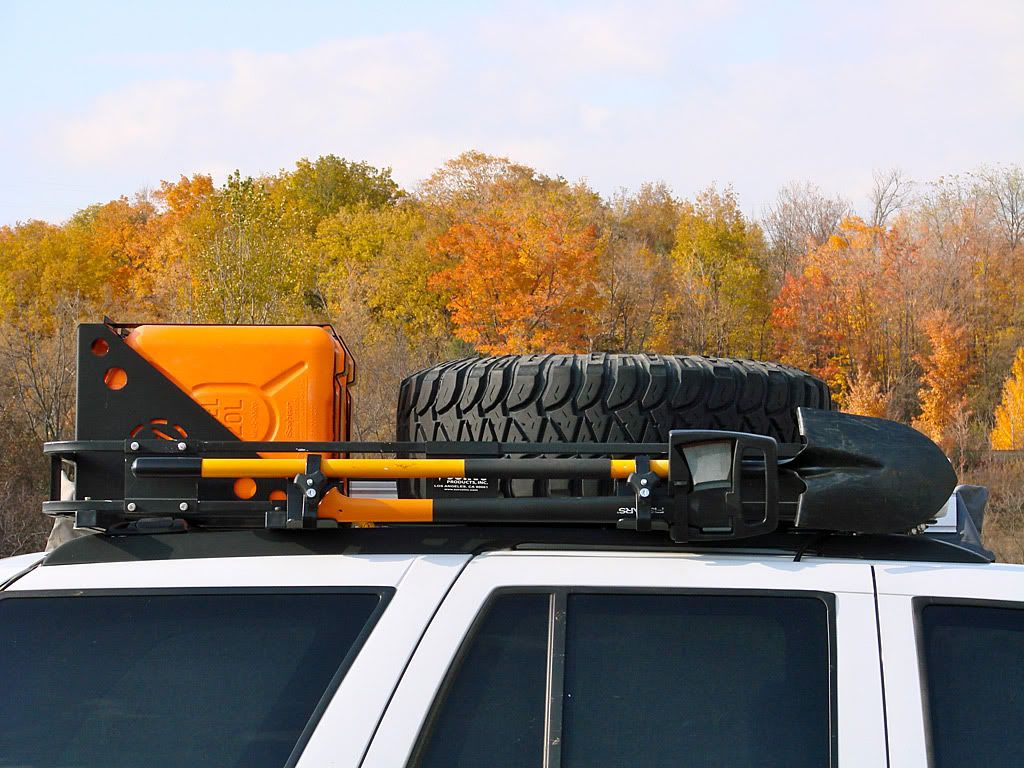
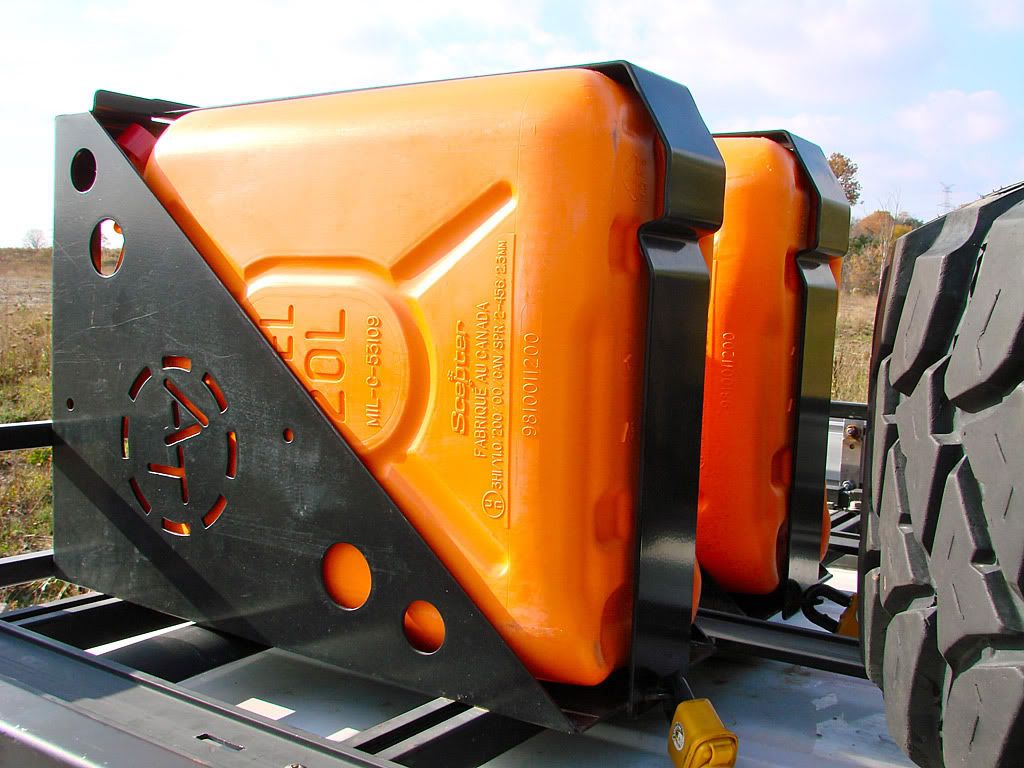
Scepter Military Gas Cans

* !Orange! * !Orange! * !Orange! *

Did you notice the shiny blaze orange gas cans instead of the red ones? The short story about this is that over the past couple of years (leading up to the new CARB laws making it illegal for dealers to sell Scepter Military Fuel Canisters in the US to the public) Scepter has been phasing out all colors for their fuel cans except for olive drab and sand.

They first phased out blaze orange cans that were mostly used by firefighters and other emergency personnel. Then just recently they got rid of the red ones. I have been looking for orange cans for the past 2 years now. I finally decided to put an ad on Expedition Portal in the classifieds offering to trade my unused red cans for orange ones. Well, somebody in California was actually looking for 2 red cans and had been using the orange ones but really wanted to trade. A few weeks later and we had a perfect exchange through couriers. Wow, the power of the Internet!

New Rack Mounting System

As described in an earlier post, Roadie and I started to question the sturdiness of the original mounting technique due to the fact that there were only 4 bolts holding the rack in place in the roof channels and that I actually bent the aluminum tabs that the bolts use when over-tightening them.

So since last year I have been trying to come up with a better way of mounting the Safari rack, but not the permanent way that Roadie has implemented.

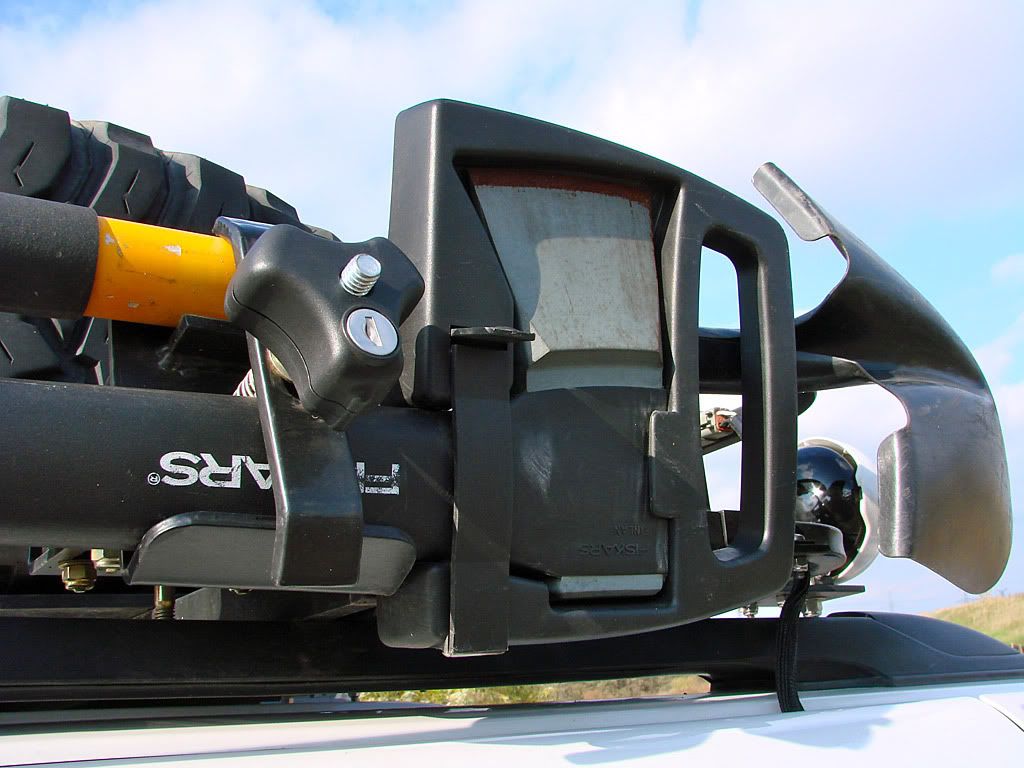
Solutions do come in the strangest of ways! Those Gobi axe/shovel locking mounts described earlier, along with the Gobi Hi-Lift locking mounts I have implemented (future thread) come with powdercoated steel backplates with 2 threaded holes each for mounting to the Hummer H2. They were not required in my solution but lo and behold ... they are the perfect size to slide into our roof rails!

So in these pictures you will see 2 larger grade 8 bolts above the roof channels. These are the ones that bolt to the backplates which are inside the channels (you can make out the backplate in the left picture). To make sure of no slippage, I purchased some rubberized matting surface and stuck it to the plate using 3M heavy duty double sided tape.

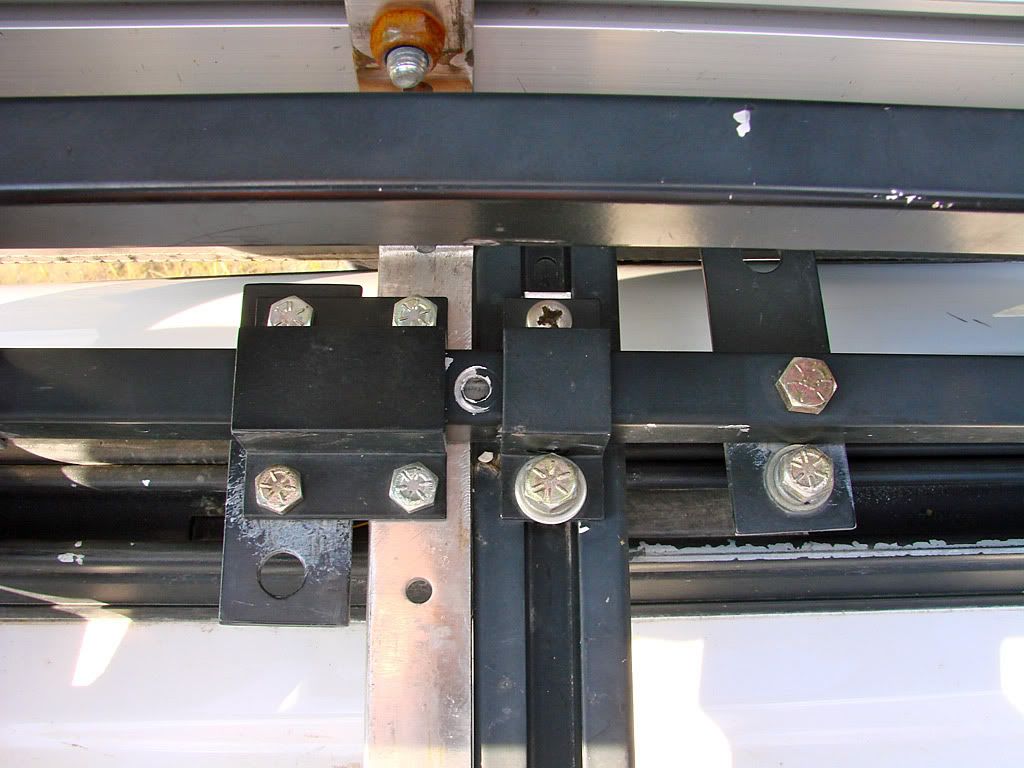
One bolt uses the original mounting hole that was previously drilled into the cross member (see previous pictures). The second bolt uses the axe/shovel mounting brackets on one side and a metal plate bolted to the rack on the other side. Once all 8 bolts are tightened down, the Safari Rack is not going anywhere!

I am glad to report that I have had absolutely no problems this year with the new system. This includes the Spring TECORE/MORA trip, the August CampNL weekend, the late summer Big Western Trip, and numerous other shorter local outings. The next upgrade for the Safari Rack will be to find a better way to mount the removable items - water cans and surplus ammo cans. I am currently using ratcheted tie downs and elastic cords but tying down and untying is a bit of a hassle and usually takes longer than I would like. So I will be looking to attach some anchor points to the Safari Rack and use some kind of semi-elastic cords (not as stretchy as the bungee-type) which will be easy to hook and unhook, but still very strong so that I don't get anything flying off the top of my Trailblazer!

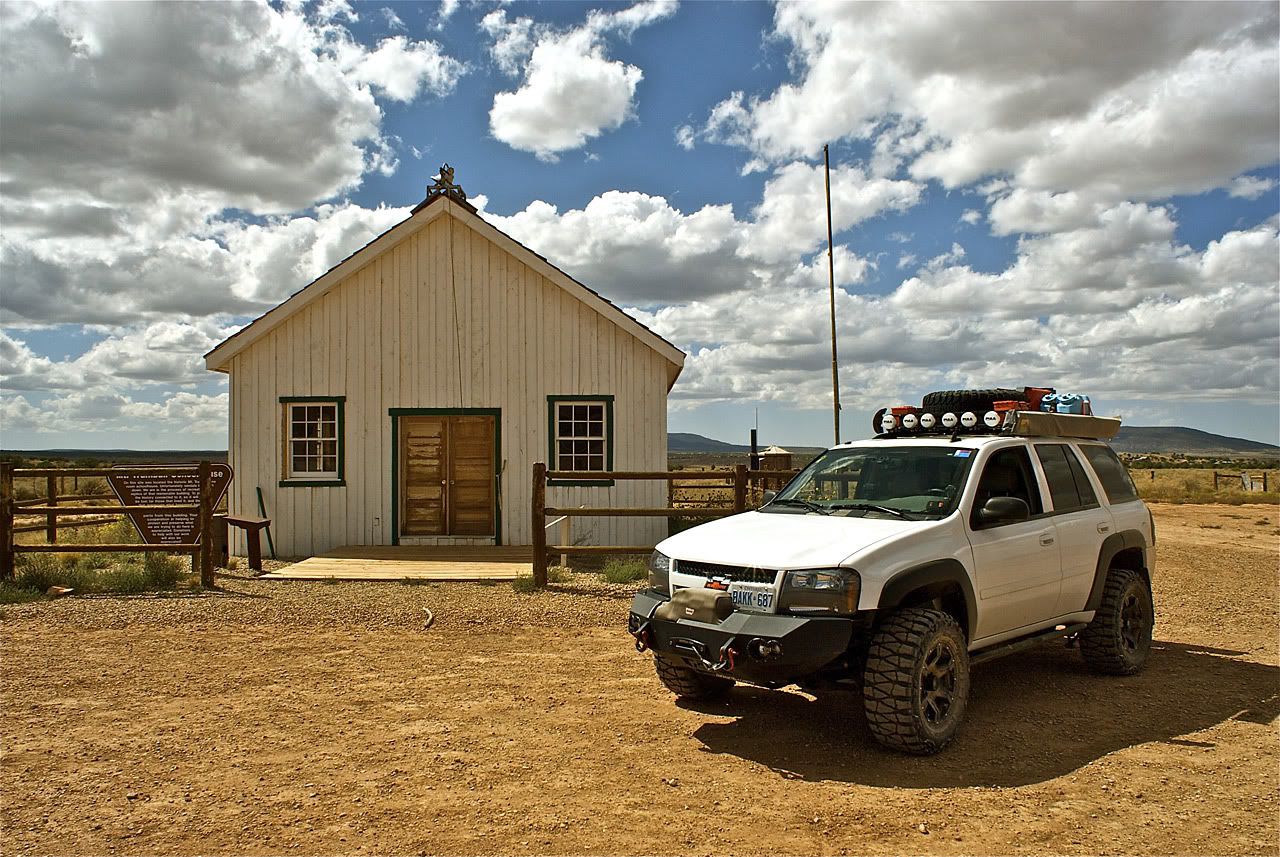
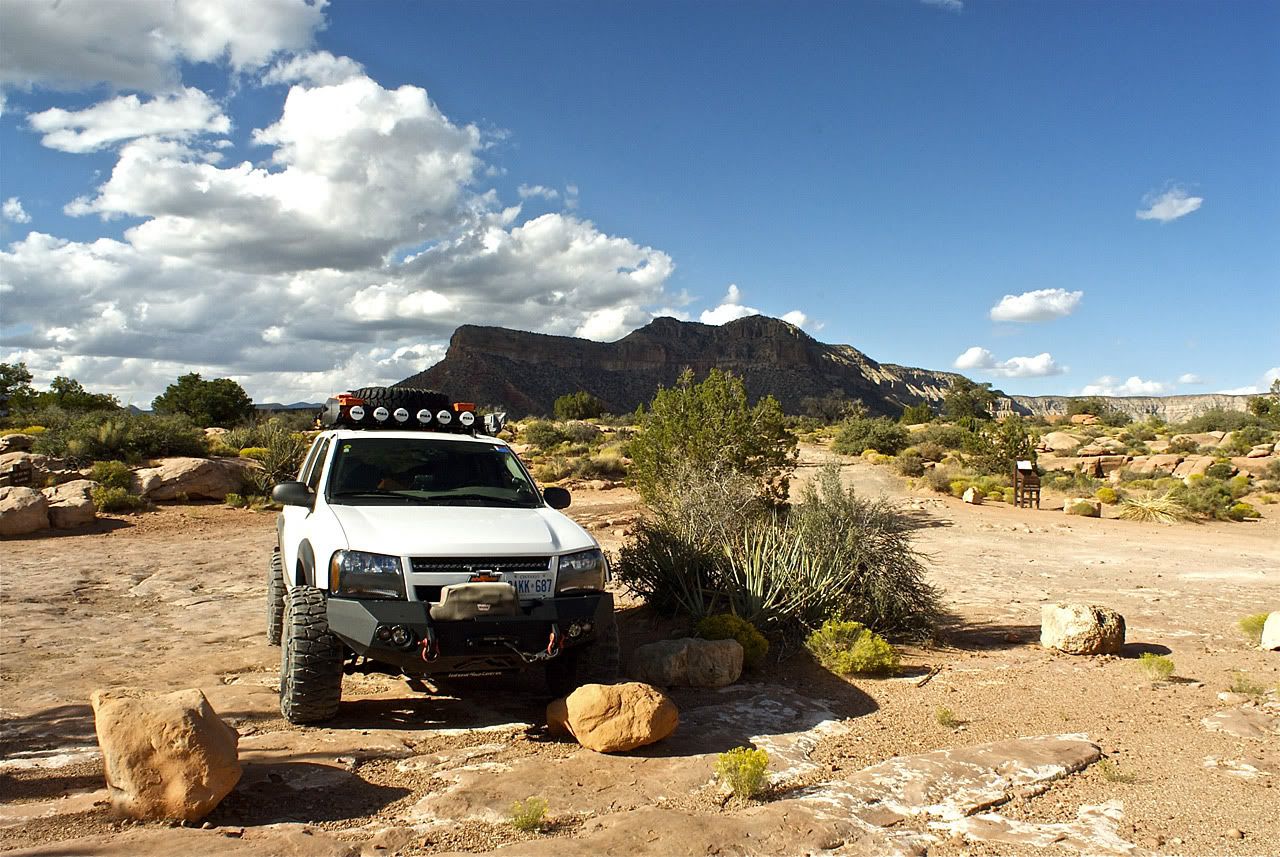
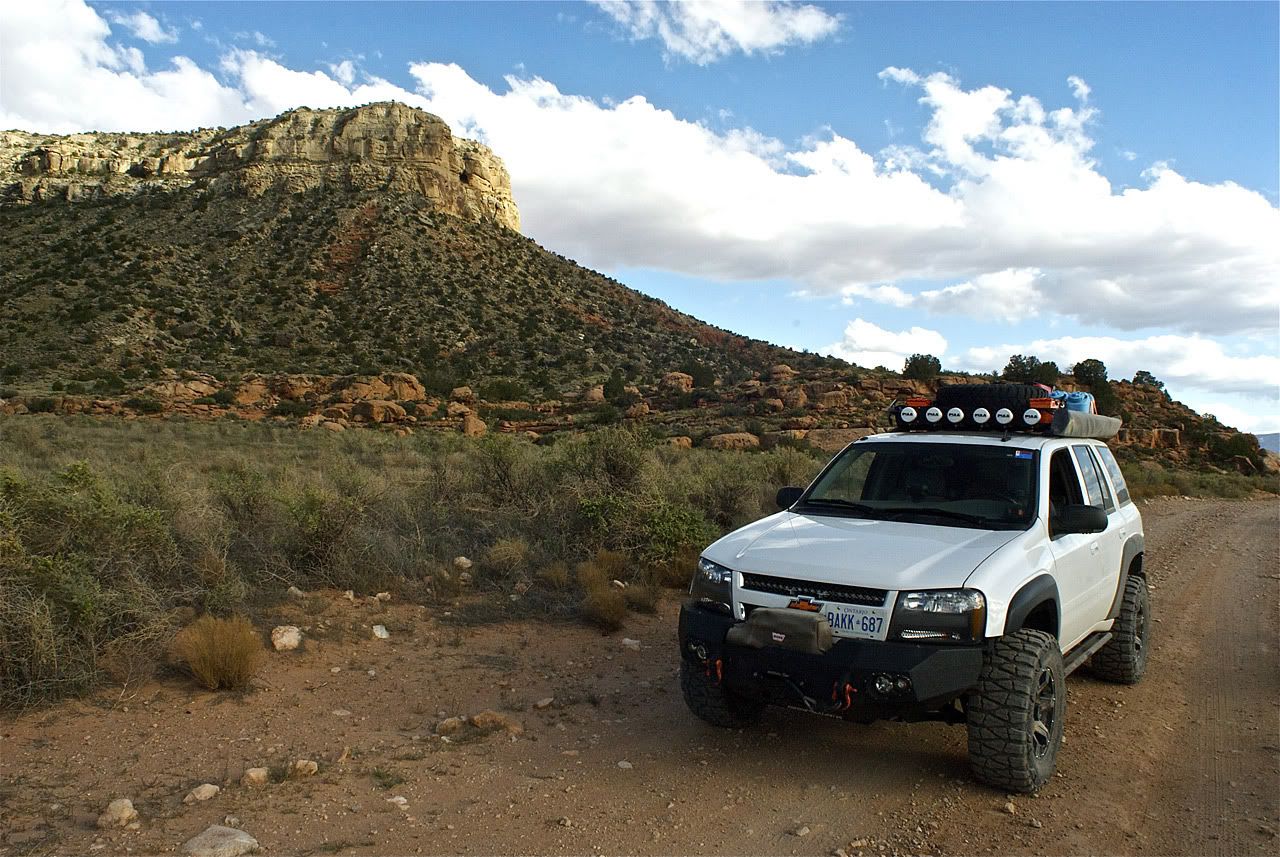
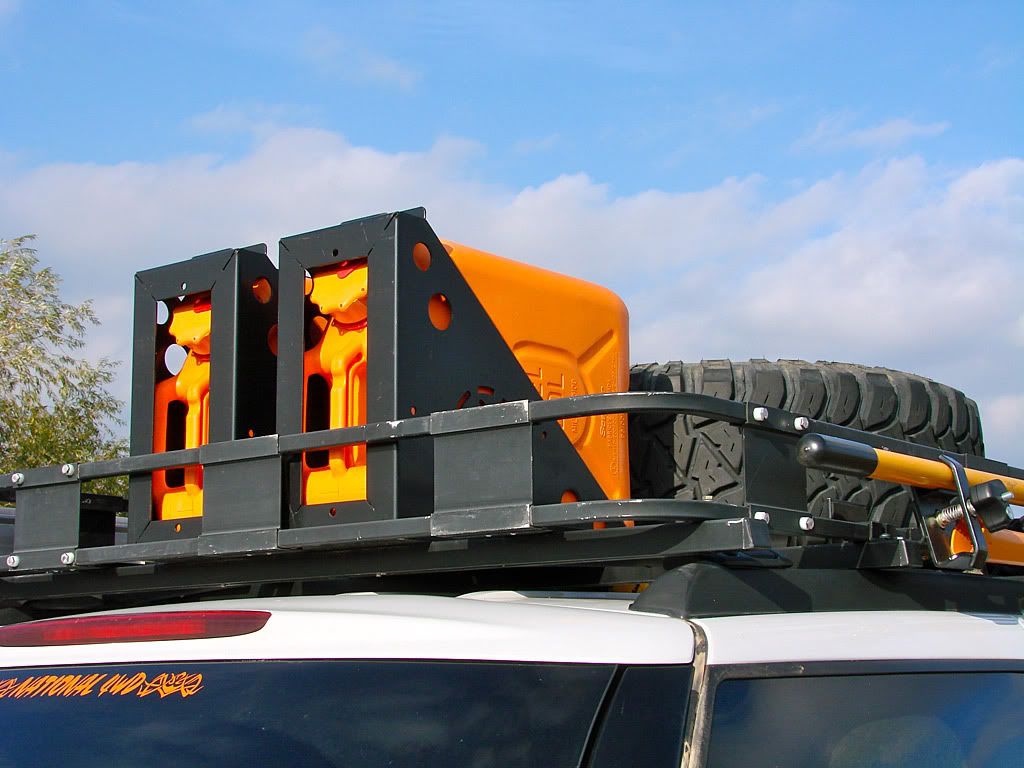
Here is a picture of the whole package for now.

Locking Axe/Shovel Mounts

October 29, 2009

Utah Expedition - Day 12 - Sep 15

Map References - Day 12 - Sep 15

September 15 track:

* large files - 1800 x 1200

View Sep 15 track in larger window.
It seemed to be looking up by the time I got to Richmond which is the starting point of the trail so I headed up into the red hills hoping that the weather would hold up. Unfortunately as I got to the top of the first crest I could see heavy rains straight ahead. I stopped to consider this for a bit as the trail is that typical Utah red clay dirt, which turns into heavy, gooey, slippery mud when wet. What finally convinced me was a column of about 10 ATVs heading down back into Richmond (where I came from) completely plastered with red mud, head to toe. So I decided to play it safe and turned around.
As I was heading back down even more ATVs passed me. What was the deal ? Well, it seems that Richmond is ATV central in Utah that time of year as the 275-mile-long Paiute ATV Trail (PATVT) passes through it ... AND ... the Rocky Mountain ATV Jamboree was in full session!
After my outstanding day at the Grand Canyon and Tuweep Overlook, this day was about getting closer to Utah's canyons.

The plan was to head north to Salina which would be my starting point for the next day's foray towards the San Rafael Swell. I chose Salina because the next town west of it is Green River, 100 miles away and too far past the starting point of the trails I chose.

I did have time to incorporate an offroad trail today on the way north so I read through my Peter Massey Utah Backcountry Adventures book and chose the Richfield Pioneer Road on page 509. It is rated at an easy 2 (on a scale of 10) with a scenic rating of 9 and a driving time of 3.5 hours.

The weather this day started out great but unfortunately grew worse as I travelled north along the eastern edge of The Great Basin to the point where I hit some pretty heavy showers going over the mountains and Fishlake National Forest.

Well, I gassed up and continued north to Salida. That evening I had a really good Mexican dinner in the restaurant right across from the Super-8 where I was staying. This is also where I spotted the blue Ascender - see picture way back on Day 1.

October 28, 2009

Utah Expedition - Day 11 - Sep 14

Map References - Day 11 - Sep 14

September 14 track:

Grand Canyon NP - Tuweep Overlook:

* large files - 1800 x 1200

View Sep 14 track in larger window.
So on this day I set out to that challenging area of Grand Canyon National Park called Tuweep and the Toroweap Overlook. Here is some advice from their website:
No one should attempt the trip without ample preparation and knowledge of the hazards associated with remote desert travel. Travelers should carry extra WATER, FOOD, and GASOLINE; GOOD TIRES including at least one USABLE SPARE; and PARTS and TOOLS to handle vehicle and tire repairs.

And just to underscore this warning, I found this press release on the National Parks Services site. It seems that just a week after I was at Tuweep, a hiker had an accident on the treacherous and dangerous Lava Falls Hiking route which descends 2500 feet from rim to river in a distance of just under 2 miles.

That morning I headed out to the BLM office in St. George to pick up a detailed map of this area of Arizona. I also filled my 2 Scepter gas cans, and checked the tires. My plan was to use the 90 mile Main Street Route for the trip there, and the shorter 60 mile Clayhole Route for the trip back to pavement.

The road then took me up and around Mt. Trumbull. A really nice drive with some great overlooks. I ran into a Forestry Dept. controlled burn on the slopes which was interesting.
Initially the driving was slower than I liked it as the graded gravel road was terribly washboarded. I ended up trying to drive on the softer parts of the road which was usually down the middle. At one point it looked like rain was coming in from the North which worried me a bit, many areas on this route become impassible with wet weather. Luckily, it stayed away. After a while the road got softer and clay based and I passed some abandoned homesteads.

The next stop was the Mt. Trumbull Schoolhouse. It has been beautifully renovated after some asshat vandals almost burned it to the ground some years back. There was a lot of interesting information inside.

This is the day I have been waiting/planning for, but first a little background. When I was a teenager, I was lucky enough to have a cool Dad that would occasionally take me on business trips (conventions, seminars, etc.) with him to all parts of the U.S.A and Canada.

One of those early trips was to a convention in Phoenix. This was our first time out west so we combined a drive to Las Vegas with a stop at the Grand Canyon South Rim. For those of you who have been there you know that it is basically impossible to put into words.

Many years later, when I had my own business and I was headed out to Las Vegas for the CES (Consumer Electronics Show), I invited my Dad along to retrace our earlier route. However, this time I decided to check out the more remote North Rim of the Grand Canyon. At the time, I thought it was "way cool" because it was not as "touristy" as the South Rim, and you were able to walk out to areas that were much closer to the canyon walls.

Little did I know at the time that there was another access point to the Canyon, one that only offroaders or expeditionists would be interested in due to its remoteness and vehicle requirements.

There was plenty of the tall plant growing after the fire. I remember seeing a picture and write up of this plant somewhere but I cannot find it now. If anyone knows, please chime in. On the slope down there was plenty of Prickly Pear Cactus. I read that the fruit on that cactus is edible, but I'm no Survivorman so I left it alone.

After more driving you enter Grand Canyon NP with its ranger station right next to the road. There is a pit toilet and some information to read. One prominent sight warns of Sand Bogs along the road to the rim.

These are areas of very soft and deep sand. The notice asks drivers to NOT circumvent them by going off the track, but to slowly and carefully plow through them, preferably in low gear. I thought about airing down but didn't. A couple did feel quite deep but as long as I kept moving, there was no problem.
Shortly after the picture above, the terrain changes to barren rock with a few tricky climbs but nothing too radical. The exposed rock continues all the way to the Tuweep overlook parking area.
As I arrived, another vehicle was leaving so I got the place all to myself. It was windy but also eerily quiet. Once you shut the engine off you get the sense that there is no human around for thousands of miles, even though you will see that it is not the case.

Now, I am not particularly afraid of heights, but a sheer 3000 foot drop I do respect! So here are some pictures from as close as I dared to venture to the rim. To get a picture of me with an interesting background, I wedged myself between some rocks that were pretty close to the edge.

I dicided to get out my 500mm lens to see if I could capture any wildlife. No luck there but I did get a couple of shots of a rafting trip down on the Colorado River.
As the sun was starting to get lower on the horizong I headed back north to get to pavement, the Arizona-Utah border, and ultimately to Cedar City Utah. Was it as awesome as I dreamed it would be?
Absolutely! And more! The pictures only give one sense of this narrow area of the Grand Canyon. The sounds (and quiet), the smells, driving 150 miles away from civilization, it all ads up to an unforgettable experience.

October 25, 2009

Utah Expedition - Day 10 - Sep 13

Map References - Day 10 - Sep 13

View Sep 13 track in larger window.
The temperatures were still into the 100s so even though Red Rock Canyon is very close to the city and there is usually quite a few tourists there, I made sure I had plenty of liquids with me and lots of sun protection.

With clear skies above, the colors in the canyon were incredible. Reds, oranges, yellows,
greens, browns ...

Red Rock Canyon seems to have something for everyone, even offroaders although ATVs are not allowed (along with driving off marked roads). The Scenic Drive loop road is paved but very nice as it takes you up close to the rocks, then higher in elevation to overlook the entire area, then back down into the flat parts. There are many parking areas that allow for great pictures as well as hiking into the rocks. The trails have varying levels of difficulty and length, plus there is rock climbing allowed in certain areas for those so inclined.

About half way through is a turn off to Rocky Gap Road. It starts as a graded gravel road that leads to some nice shady picnic areas. Past that it is marked as a high clearance 4x4 road. I followed a Pink Jeep Tours vehicle up into the mountains and at a turn, he let me pass as they were going slowly to allow for pictures I guess. I asked the driver/tour guide wether the trail was a dead end. He indicated that their tour turns around soon but that the trail itself continues on, but deteriorates. He also said that if I used my GPS I could probably follow it all the way to Pahrump on the California border.

Later that evening I took a look at Google and my GPS Topo maps. Even though the trail is not marked on Google, using the satellite images you can see that it does make its way to Lovell Canyon Road, which leads to Lovell Summit road, which ends up in Pahrump. That would have been an interesting drive through Toiyabe National Forest but unfortunately, not on this trip.

After reaching where the trail becomes quite rocky, I decided to turn around and take some pictures at what looked like a nice back country camping area.

I then headed back into Vegas, north-east through Arizona, and into southern Utah, all the while hoping that the weather would hold up as the next day was going to be a big one, something that I had been looking forward to for many years.
As I drove along the back half of the Scenic Road, I tried to get some pictures of the western mountains (Bridge Mt, Mt. Wilson) as the sun was starting to set behind them. And finally at the exit to Red Rock Canyon, there is another great overlook.
OK, so I blew it in regards to overland adventure around Vegas. I would have really liked to have gone to Death Valley and seen The Racetrack with the moving rocks, or the Valley of Fire, or Mount Charleston.

So this day I decided to at least go visit Red Rock Canyon which is just outside of Las Vegas.

October 24, 2009

Utah Expedition - Days 8 & 9 - Sep 11, 12 - The Lost Days

Oh the shame ... warning, this post has no overlanding value whatsoever.
So I arrived in Vegas the night of September 10th with big plans. But first I had to find an all-night car wash to get rid of all the mud and dust from the past 10 days, and to re-arrange some items in the back so that it would be easy to check into the hotel.

Then I headed up Las Vegas Blvd. (The Strip) towards my hotel. What I didn't anticipate is that there would be 2 separate areas of road construction (they obviously work during the night) which made a 10 minute drive into a 1 hour painful crawl. Well, at least I got some nice shout-outs from people admiring the Trailblazer.

When I finally arrived at the Flamingo, I ended up tipping the valet so that he would park the truck right in front of the entrance. Plus with the Safari rack, he said it would probably not be able to make it into the garage.

Stupid me, I ended up not getting a picture of it sitting in front of the entrance.

So what were my big plans? Well, because of past visits, and the economic downturn (Vegas needs visitors!), I was able to get 3 nights for free at the Flamingo. So I was going to use this as my base to go explore places around the area. Things on my list were Red Rock Canyon, Death Valley, and the Grand Canyon at Tuweep as a start.

I should have taken the construction as a warning as several things started to make these 2 days in Vegas the Lost Days, in terms of overlanding that is. I go to check in and their room booking inventory system is down. So thats another hour and a half in line waiting to check in. So to speed things up they are scrambling and offer me a better room for the 1st night and $50 credit ... but I would have to switch rooms the next morning. I didn't want to wait anymore so I accepted.

Well now that I was here, I wasn't going to just go to sleep so I decided to walk across the street to my old stomping grounds, Caesar's Palace.

I make a bee-line over to the Seahorse Lounge where my favorite bartender is the supervisor and we catch up on old times over several Martinis. Needless to say it was a long night.
Next morning (Day 8) I have to transfer rooms so there goes half the day. I decide to use the rest of the day to recover a bit and plan for the next day where I wanted to head out to Death Valley. At night I decided to head over the Caesar's again for a couple of drinks and bit of time at the tables.
Big mistake #1. Instead of Martinis I start up on Mojitos, my bartender makes killer ones. I then take my pre-planned gaming budget to the tables and the worst thing happens. I don't start to win right away, but I don't lose right away either. Six hours later I stumble back to the Flamingo, pretty much breaking even, but now its 5 in the morning!

I somehow wake up at a decent hour on Day 9 and scramble to get ready for Death Valley. Oh, did I mention that Vegas was experiencing an unseasonable heat wave? Temperatures were reaching 105 for the past week and there was no let up in sight. They should have been in the high 80s this time of year.

So it dawns on me that I should at least check the temps in Death Valley. I go online and the forecast was for 140! At this time what is left of my better judgement kicks in and I decide to not take a chance with a solo trip to Death Valley in 140 degree weather. I think a bit about heading over to Tuweep and the Grand Canyon, but looking at the maps I see that there are over 150 miles offroad through varying levels of graded gravel and dirt road. I decide that it is too late in the day for that and that a trip out to the nearby Red Rock Canyon would be a better choice. OK, let me go grab lunch first.

Big mistake #2. I head down to Jimmy Buffet's Margaritaville right in the Flamingo. The food was great, but the Margarita's were outstanding! All six of them. Well, there goes my afternoon trip out to Red Rock Canyon. I wake up later that evening and head over to Caesar's again for a small dinner. The rest as they say "will stay in Vegas".

So that is how I ended up with 2 days of my Big Western Trip with absolutely no overlanding whatsoever. Oh, and I didn't end up even taking any pictures. OK everybody, feel free to let me have it!